Saturday, October 30, 2010

Embrace them. Love them. Make them.


I am a working mom. I know every mom works, believe me, raising monsters is a full time job, but I also work out side of the home. Having a job out side of the home adds extra demands and stresses on me, but some of those demands can be fun! For instance our Halloween Party at the office. The Activities Committee, which I am a part of and is so fitting for me because I am always planning something, is hosting our Second, hopefully Annual, Halloween Party at the office for our co-workers and their families. It was actually yesterday and another huge success, but back to the story. So, we are having this party and asked that people sign up to bring in treats, baked goods, dips, whatever you want to bring to share with everyone.

Take one guess what I signed up for? Being the mom that I am, first thought, cupcakes, second thought, 40 children in costume covered in gooey orange and black frosting. Ummmmm, that's a no. Second thought, maybe I should bring something a little less disastrous. Yep, you know it, every mom knows it, cookies! Every busy mom's third thought, when am I going to find the time to make them?

Logen and his buddy Corduroy.
Time to do anything around this house usually comes after dinner, 7'ish I would say. That leaves just about an hour before bedtime and gives us something to stay busy, by us, I mean the kids. Logen had Corduroy, the class pet, from school this night. All of you moms out there, don't get scared, I know it is Halloween and all, but by saying class pet, I don't mean some goldfish or guinea pig. Thankfully, the wonderful teachers at Logi's preschool have a lovely and very cute stuffed bear as the class pet and his name is Corduroy. Logen was kinder to that bear than he is to his sister, but that could be a whole nother post in itself. Logen wanted to include Corduroy in everything so he also helped make cookies.

Now, I know you are all thinking, how does she do it? How does she find the time to fit everything in and not kill someone? Trust me here people, this one, these cookies, they are all a sham. Yes, a sham. Sometimes there isn't enough time to make everything homemade and everyone knows that. We shouldn't be ashamed to admit that either. I am no Suzie Homemaker or Martha Stewart, I just like to look like it and that is exactly what went down with these cookies.

These cookies came from a pouch, yes a pouch. You know the ones where you add an egg and a stick of butter, mix and bake. Those pouches are sent to every busy mom straight from Heaven. Embrace them. Love them. Make them.

I made these cookies for the Halloween party, but I did spruce them up a bit. I said I wasn't Martha Stewart, I just want my stuff to look like it.

Here is what I did:
Sugar Cookie Pouch-yep, straight from the store
1 stick of butter
1 egg
Lots of sprinkles.

This can not be any easier. Mix together the pouch, egg, melted stick of butter until the dough forms.
Heat the oven to 350.
Get out your cookie sheets. YES, it really is this easy!

Here is where the Martha Stewart in me comes out.

Get cookie scoops! I never thought I would buy into these things, but I LOVE them. Pampered Chef sells them in three sizes and I use them all and not just for cookies. For this event I used the medium sized scoop. It precisely measures out the perfect size cookie.

Now scoop the dough, but when you pop the dough out of the scoop, instead of putting them right onto the pan, pop it into you hand and give it a little pat to flatten it out slightly. I have found that this really helps the cookie take a most perfect shape and it only takes a second AND it also helps with the sprinkles.

The BEST way to ever do sprinkles
Make sure you have poured your sprinkles into a bowl. You do not want to actually sprinkle them onto the cookies. That makes a big mess on your pan and does not cover the cookie evenly. You are going to want to place that lovely little dough pattie right into the bowl of sprinkles. Give it a light pat and pick it up. You only want one side of the cookie covered with the sprinkles.

My beautiful helper.
Lay them out onto the pan as you normally would and bake.


When you take them out of the oven, the edges will be slightly brown and you need to let them relax on the pan for at least a minute to firm up. Don't over bake! I think my sugar cookies were in the oven for only about 7-8 minutes.


Relaxing on the pan.
After they have relaxed on the pan for a minute or two, remove them from the pan onto the cooling rack and let them cool.


That's it! Done! Martha's cookies sent from Heaven. Embrace them. Love them. Make them.

Sunday, October 24, 2010

Seed Savvy

It's that time of year when you can just feel fall is in the air. The smell of burning leaves is all around, football is in full force, except for the Bears, and kids all over want to carve pumpkins. Carving pumpkins has always and will always be one of my favorite things to do. I can still remember doing it as a kid and I remember when my dad brought home these new pumpkin carving knives for kids. You know the kind that are all over now with the orange handles and dullish blades, but can they slice a pumpkin! I still have the original ones my dad brought home. In fact, I used it last night. It still has the black sharpie Dana in my mom's handwriting on it so that there would be no fights over who's knife is who's. Hey Dena, I have yours too.

I really don't remember saving and roasting the seeds though. I can't tell you if we did it and I just don't remember or if it is one of those things we never did, like Jiffy Pop.  Yep, I was in my 20's the first time I ever did Jiffy Pop. Anyway, Jasen and I have always roasted the pumpkin seeds. We did it when we were dating and we do it now. He loves them and it is something he remembers doing as a kid. So the tradition continues.

Last night all four of us carved pumpkins, carefully saving the seeds. The kids did a wonderful job of drawing faces onto the pumpkins and I carved them out. We put candles in them and lit them up. They are so cute, but once they were lit and on the porch, we came inside and I started my quest for delicious pumpkin seeds.

Freshly washed pumpkin seeds
just waiting to become a yummy
delicious snacky.
Pumpkin seeds can be tricky. Yes, very tricky. They can be too salty, not salty enough, to wet or even worse, burnt. Burnt pumpkin seeds are as bad as burnt popcorn. You just don't want it. You have to have the pumpkin seed skills to make a great seed and it seems to me that I do have those skills.

Here is what I did:

Warning, this is one of those things that I make that I do not measure, at all. I will do my best to describe what happened, but go with your personal tastes to make it perfect for you.

On the stove top, melt a stick of butter. I know, a whole stick.

Melted butter and garlic.
I could just dive right in.
Add fresh pressed garlic, about 4-5 cloves. The trick to getting it to go through your garlic press the easiest, put the cloves into the microwave to 15-20 seconds. It will get hot FAST, so don't over do it. You will not believe how easy it is to peel and to press.

5-6 cranks on your sea salt grinder and about the same for black pepper.

Add the seeds and let them saute in the pan for about 10 minutes stirring all the time.

Pre-heat the oven to 350.

Dump the sauteed seeds and all of the butter and seasonings on the a cookie sheet and spread them out.

4-5 more cranks of sea salt and black pepper, a couple shakes of garlic powder and then shake grated Parmesan cheese all over them. Yes, everyone knows I love to add cheese to everything, but add it, you will like it. I promise.

Mr. Pumpkin Seed 2010   

Put them in the oven for 10 minutes, at the 10 minute mark, stir, flip, mix, whatever, but smooth them back out. Do this 2 more times, so 30 minutes total. They should be getting pretty dry by now.

You want them to be dry, but not burnt. That is where the tricky part comes in. When they are near the end of cooking, you really have to babysit these bad boys or you will have crappy burnt seeds on your hands. No one wants crappy burnt seeds, so trust me, watch them.

There you have it! Take them out and let them sit on the cookie sheet to cool.

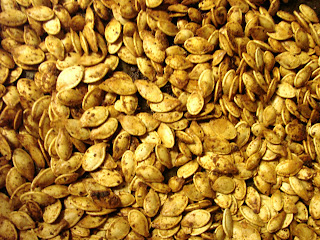
They should be this golden
color when they are done.
When they are completely cool, then and only then, put them into an air tight container. If you do this when they are the least little bit warm, condensation will form in the container and that will ruin your seeds.

There you have it. Delicious, addictive, oh so good, pumpkin seeds.
Get out and get your own today.

Wednesday, October 20, 2010

Saucy Expectations

I don't even know how to start this one because I can't even compare. There are things we all grew up with our moms cooking and most of those things become our all time favorite meals, at least that's how I am and one of those favorite things is my mother's spaghetti sauce.

Everyone enjoying the sauce.
Izzy even wanted in on the action.
My mom makes the most delicious spaghetti sauce around. I must say that Noni, when she makes it, makes a kick ass sauce, but my mom's is legendary. Yes, legendary. Just ask Jasen. I think that is part of the reason we got back together so many times when we were dating. He just couldn't give up the sauce. It is a meaty goodness that has a kick and has simmered on the stove top all day. It is great.

Since we have been married, we are going on seven years, Jasen has been begging me to try and make the sauce. I'm not going to lie, I'm scared. How in the world is my sauce ever going to live up to his saucy expectations? He thinks because my mom makes it that I should be able to make it just as good. Not so. The woman uses no recipe and when asked about it she says, I don't know, I just do it. Thanks. Thanks mom for passing that down. Now I know if I sat there and watched, I would be able to at least get the ingredient list, no measurements, but a list, some how, it just wouldn't be the same. She's just the master of sauce, but I finally decided to give it a try.

I found this recipe that kinda sounded like it would taste good. It was part of the lasagna recipe I found and I thought, what better time than now? I went to the store, got all of the ingredients and started. It was a lot easier than I thought it was going to be which made me very leery about what it was going to taste like. Simmer, simmer, simmer, lets give this sauce a little try. HA! It's good! Not my mom's good, but a good start in the right direction. I used it in the lasagna and I must say, it was the best lasagna I have ever had. Better than eating out. Jasen even gave his seal of approval by cleaning his plate of any remaining sauce with a chunk 'o garlic bread. Now I have the bones of this sauce. I can do this. I can make sauce and I will improve on this and make it even better next time.

Here is what I did:
1lb sweet Italian sausage, I have also used mild Italian and I want to try hot next time

3/4lb ground beef

My FAVORITE kitchen tool.
Yes, as seen on TV, and it is AMAZING!
I use it for everything, not just onions.
For reals people, go get it.

1/2 cup onions, but I like onions, so I use about 1 cup of diced onion


It called for 2 cloves of garlic, crushed. I laughed and used about 6.

280z can crushed tomatoes
2-6oz cans tomato paste
2-6.5 oz cans tomato sauce
1/2 cup water, I just use the tomato paste can and fill that once

2Tbs white sugar

1 1/2 tsp dried basil, again, I prefer fresh, but dried will do

1/2 tsp fennel seeds, which I didn't have so I didn't use

1tsp Italian seasoning, again, laugh. I have this seasoning, that I know my mom does use. Tone's spicy spaghetti seasoning. I love it and use it for more that just sauce, but I covered the top of everything already in the pot, so yeah, ha to the 1tsp. Seriously? What is 1tsp really going to do?

1Tbs salt
1/2 tsp ground black pepper
4Tbs parsley

Ok, that sounds like a lot of things, but really, all you do is brown, measure, stir and simmer. Bear with me.

So, brown the sausage, take it out of the casing which I learned the hard way, ground beef, onion and garlic over medium heat. Take out the grease. Add the crushed tomatoes, tomato paste, sauce and the water. See, easy, right?


Season all of that with the sugar, basil, fennel(if you have it), Italian seasoning, the salt, pepper and the parsley. Never be afraid to season people! That is what gives you the flavor.


Stir and simmer covered 1 1/2 hours. That's it. Really, that's it. I told you it wasn't so bad.

This time we had it over ravioli and it was tasty. I also made white trash garlic bread. In case anyone was wondering, I wasn't lying when I said I make things out of nothing. We didn't have any garlic bread, but we did have some hogie rolls. How can you eat Italian with out garlic bread? You can't. So, here is my rendition of garlic bread, the white trash way.

Here is what I did:
Opened the hogie rolls and put them onto the cookie sheet
Generously spread on the butter
Sprinkle with garlic powder. NEVER use garlic salt, yuck, salt.
Turn the broiler on high, put the bread in and keep an eye on it. LISTEN UP! Keep an eye on it it. It cooks fast.

There you have it. White trash garlic bread. Hey, it worked.
White Trash Garlic Bread
It's even burnt. How trashy.


Working on cleaning his plate.

Wednesday, October 13, 2010

Get over it and get your flat breads.

I have never claimed that I make everything "home made".  Personally, I think if you took the time to throw it together and heat it up, that's home made enough for me, which is why I tend to enjoy that semi-home made show. I think that lady, I think her name is Sandra, has some really interesting and delicious ideas. Using things that you can buy already made and coupling them with fresh ingredients to make something great is right up my alley. It's a time saver and who doesn't like to save time?

This leads me to tonight's post. Let's just say that if I had time to make dough for pizza I would, but seriously, with two kids, a full time job and everything else that I pack into a day, forget the damn dough, I'll just buy it.  During one of my trips to the farmer's market, one of my favorite places to get produce, I came across flat breads. Not just any flat breads, no, these flat breads are covered in the most delicious olive oil and pesto garlic sauce you have ever tasted. This stuff is so delicious that it makes me want to lick the greasy bag it comes in. I really have to give a shout out to Parmesan's. It is a wonderful little Italian place here in Frankfort that makes tasty food and the tasty flat breads that I have come to love so much! Here I am with these tasty little flat breads and as delicious it would be just to eat the flat breads as they come, I decide, let's make these into what else? Pizzas!!!!

Seriously people, take a look at the lovely pesto
and tell me you don't want a bite.


I love a good pizza and not just your run of the mill pepperoni or cheese. I really do enjoy specialty pizza. Again, Parmesan's makes a wonderful pizza with chicken and garlic. Seriously, if you go there, order it. It is one of Jasen's all time favorite and for a die hard, I need sausage on my pizza kind of guy to love this chicken pizza, you know it has to be good. Since I have this love of specialty pizza, I decided that tonight I am going to make a flat bread pizza with tomato, basil and gorgonzola cheese, one of my all time favorite cheeses. This pizza is a spin off of one of my favorite sandwiches that I am sure will make it's way onto this blog sometime.

Here is what I did:
Bought the flat bread in all of it's garlicy glory. Put it on a cookie sheet, not greased.

Sliced up two tomatoes and put them on the flat bread.

Lightly sprinkled tomatoes and flat bread with a light dusting of garlic powder. NEVER  garlic salt.

Put on the gorgonzola all over, the more the better in my opinion.

Sprinkle with dried basil, a good amount. You want to be able to taste the flavor of the basil mixing with everything else. Personally, if you can get your hands on some fresh basil, cut it up into little shreds, I like to use kitchen shears to do this, and use it instead of the dried. You will be amazed how much better the fresh stuff really is.

Turn your oven onto broil/hi.

Put the pizza in until the cheese is melty and browning.

My two best men enjoying
a slice of my flat bread pizza.

Take it out and let it sit for a few minutes, cut and enjoy.

Can it get any easier? Doubtful. Maybe if we all had personal chefs to do it, then it would be easier, but get real people, we are never going to have personal chefs. Get over it and get your flat breads.

P. S. Parmesan's, you owe me for the shout outs, but I really do love your flat breads.

Come to mama.

Monday, October 11, 2010

Looks like Martha made them.

Last night I went outside of my comfort zone and made this Pumpkin Log with Cream Cheese frosting sprinkled with pecans. It tastes wonderful, but as Jasen put it, a deflated log would be a bad thing in some aspects. The recipe said to roll it in a towel generously sprinkled in powdered sugar. I asked for and needed prayers. Well, there weren't enough prayers, it was deflated. Long story short, I had extra pumpkin and cake mix and thought, hmmmmm.....what can I do with this?

Looks like Martha made them.
Not unless Martha has those crappy fake
wood looking counter tops just like ours.
Doubtful.
    
    
I am always trying to make something out of nothing or trying to make something better than the recipe originally is. That's what I do. A pinch here, a dash there, hell if all else fails, add butter and garlic. Better yet, add cheese. Yes, I am in love with cheese. I am sure if I keep up this blogging thing, you will all come to know of my loving relationship with cheese.

So, here I am with this extra pumpkin and cake mix. I kind of got the just of what to do to from the deflated log from the night before, but I wanted to keep it somewhat simple. Cupcakes. Not just any cupcakes. Pumpkin Cupcakes with Sweet Cream Cheese Frosting sprinkled with finely chopped pecans. People, I watch waaaaaay to much Food Network and I am continually thinking, I can do that, so here I am. Ingredients in front of me just waiting to become something fabulous!

Here is what I did:
Wait one minute! I have to warn all of you in advance. I am not a by the book cook. If it is the first time around making something, then I will usually follow the recipe, UNLESS, I just know it will be better if I add a little something here or there, which is usually what happens. I also don't measure very well. A little here, a little there. You get it, but I will do my best to give accurate descriptions of what I did, so hopefully we can all recreate the meal again.

With that said, here is what I did:
Half of a 15oz can of pumpkin-not the pie mix, the actual pumpkin
Box of yellow cake mix, minus the 1 cup I took out for the roll the night before
I followed the rest of the directions on the box, but I only had 2 eggs instead of 3.
Changed 1-1/4 cup of water to 3/4 and a dash of oil not 1/3 cup.
Couple shakes of the nutmeg, cloves and pumpkin pie spice and then a good couple shakes of cinnamon. I warned you I make it up as I go.

Mixed it all up, baked in paper cups at 350 for about 17 or so minutes. Took those babies out right when the testing stick came out clean. Took them out of the pan immediately and let cool on a wire rack. This part always kills my kids. Mom are they cool yet? No. Can we have one yet? No. What about now? No.

Frosting was something I found on line, but edited, of course.
1 block of cream cheese, soft
1 stick of butter, soft
1 tsp. vanilla
about 2 cups of powdered sugar

Mommy's taste tester.
Complete with
frosting face.
Beat the cream cheese and butter until smooth. Tip: Do not taste it just yet. It doesn't taste good. Trust me. You will be tempted, don't do it.
Add the vanilla and mix.
Slowly add the powdered sugar a little at a time, mix medium to slow and scrape down the sides of the bowl. Keep adding it until it is the sweetness you prefer. Now, now is the time for taste testing! Payten and Logen just loved the frosting, so it must be good.

Wait until the cakes are completely cool, fill a ziploc with the frosting and cut the tip off one of the corners of the bag. Squeeze all of the frosting down and frost the cupcake! That's it! Easy!

Chop the pecans super fine and sprinkle the tops of the frosted cakes.

Done. Now you can have one.

So, here you have it. My first post on my first blog. I will know if these cupcakes were a success in a few short hours. I am using my work friends as guinea pigs for these, but from the smell in the kitchen, I know they are going to be delicious. Hmmm, maybe a little more cinnamon.